Develop Control Application
In the last chapter, you learned about controling the robot and using the development environment. To get you one stop nearer to the final goal, an application that will finally navigate obstacles and find a hat, we provide a first simplified version of it. Let’s call it an Minimal Viable Product(MVP).
Review and test the code, but don’t spend too much time with it.
MVP Code
The basic code requirements are:
-
retrieving an image
-
sending it to the object detection service
-
analyzing the results
-
detected class
-
confidence score
-
coordinates of the bounding boxes in your camera image
-
-
use the result to determine how the robot should move
Change the code in your dev environment to this :
log_with_timestamp("startRobot thread has started.")

turn_counter = 0

while thread_event.is_set():
    log_with_timestamp("Entering main control loop.")

    # Drop your code here
    objects = take_picture_and_detect_objects()
    coordinates = find_highest_score(objects)

    if coordinates and coordinates.confidence_score > 0.5:
        print(f'''Object with highest score -> [
            confidence score: {coordinates.confidence_score},
            x upper left corner: {coordinates.x_upper_left},
            y upper left corner: {coordinates.y_upper_left},
            x lower right corner: {coordinates.x_lower_right},
            y lower right corner: {coordinates.y_lower_right},
            object class: {coordinates.object_class} ]''')

        # Find the middle coordinate of the object, image size is 640x480
        move_x = (coordinates.x_upper_left + coordinates.x_lower_right) / 2
        print(f'move_x: {move_x}')
        # should the robot move left or right to center the object
        if move_x < 320:
            turn_left(10)
        else:
            turn_right(10)

        # calculate the size of the object as it will grow when driving towards it
        delta = coordinates.x_lower_right - coordinates.x_upper_left
        print(f'delta: {delta}')
        # stop if delta (size) is above a certain value
        if delta < 350:
            move_forward(10)
        else:
            print('Done - arrived at the object')
            break

    else:
        # no object detected, turn the robot and try again
        if turn_counter < 360:
            turn_left(10)
            turn_counter = turn_counter + 10
        else:
            print('Done - no object found')
            break

log_with_timestamp("Exited main control loop.")
What does this code do, you ask?
First, it keeps on looping until someone presses the Stop button. It takes a picture from the camera, finds the Fedora object with higest confidence score.
Then, it looks for the center of the bounding box. Depending on the position of the center point in the camera image, the code decides if the robot needs to turn left or right to align it with the fedora.
After that, it keeps on driving until the bounding box has a certain size, which means that you are close enough to the Fedora.
Now, place a Fedora somewhere near your robot and see if it can find it.
Pushing your Code
Currently, your code only resides in your Workspace which is called the "Inner Loop" in Development terms. To publish and build later, you will need to push your code to your Git repository. So let’s already practice this.
To be able to push you need to set up your git email
-
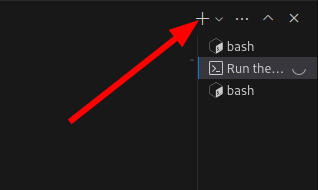
Open a new Terminal by click on the + Icon in the bottom right and choosing New Terminal
-
enter
git config --global user.email "pilot@robot.to"
git config --global user.name "pilot"
To push your code:
-
In the Dev Spaces menu on the left click on the Git icon
-
Your modified files will be shown
-
Select the relevant files (
app.pyandconfig.py)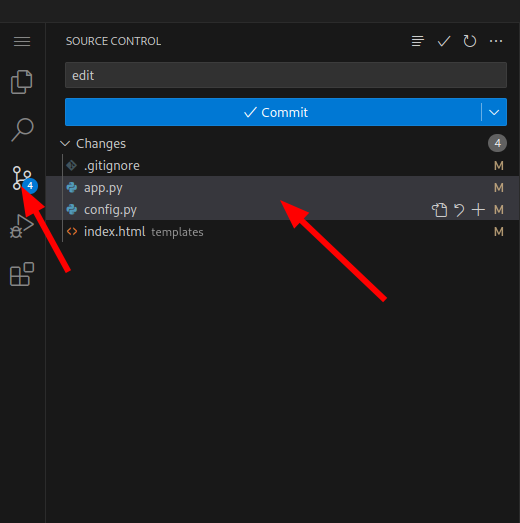
-
Right Click and select Stage Changes
-
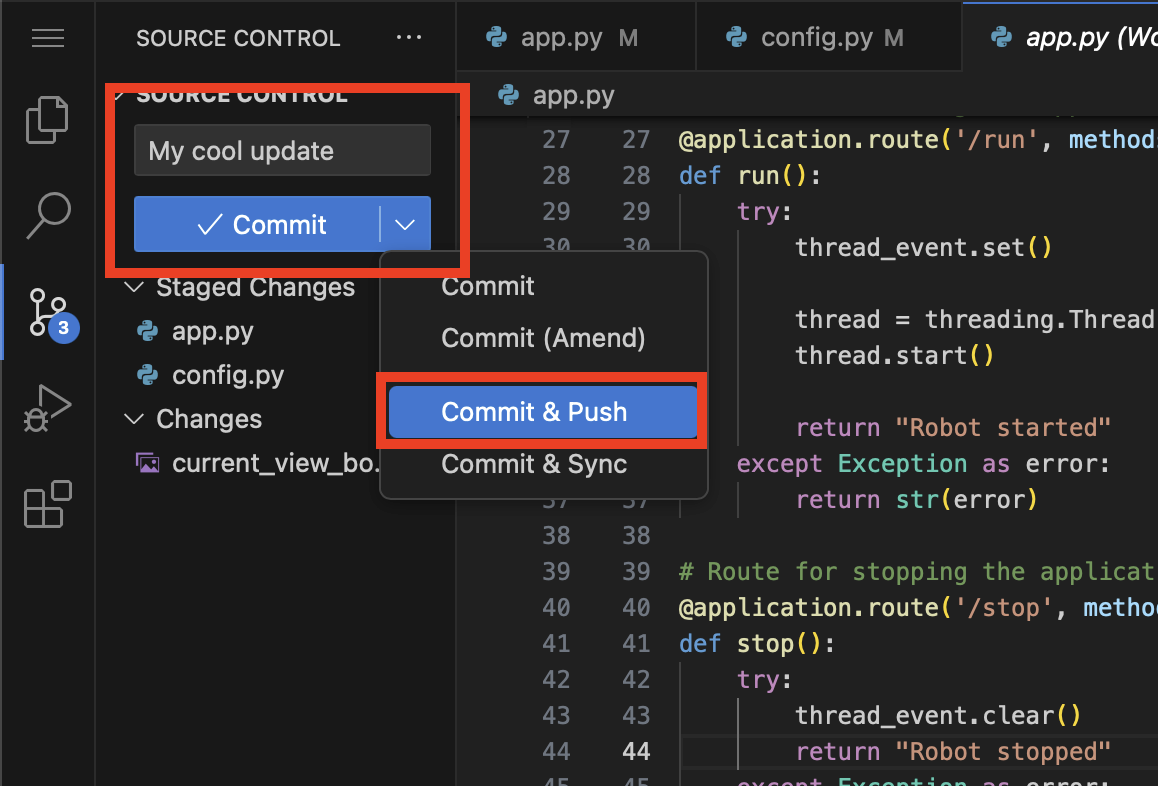
Enter a comment in the top field
-
At the blue Commit button, click on the downwards bracket at the very right and choose Commit & Push
-
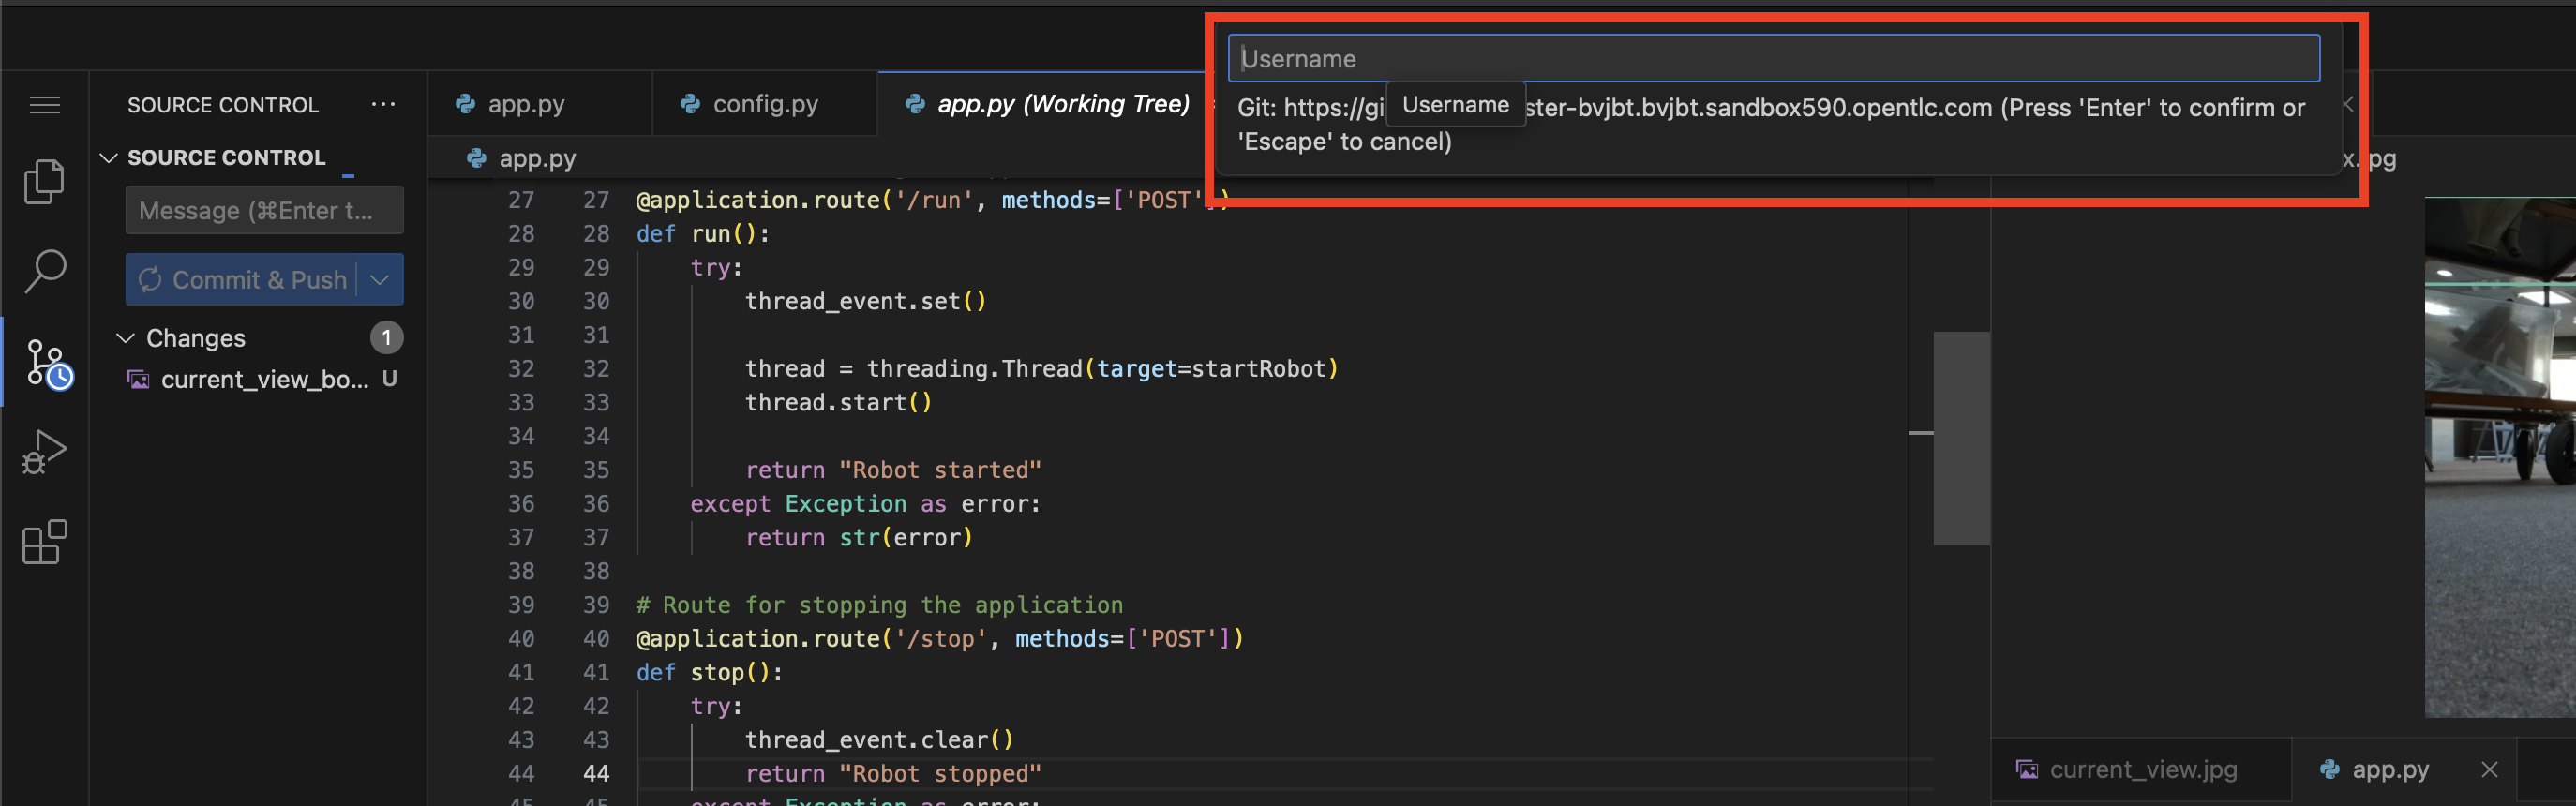
On the top a prompt dialog will open to enter your Gitea username and password
-
username:
team-1 -
password :
secret-passwordNow you code has been pushed to your repo. You can check in Gitea if you want.
-